Briosphere Cloud
Introduction
This page explains how to enable device communicate with Biosphere.io. At first, we will see how to configure the device itself. Then the cloud features will be explained.
Device configuration
Before proceeding with the device configuration, the BrioSens needs to be registered on the Briosphere platform. Refer to the Brioshere.io section.
Make sure you have the following:
- The unique MQTT password for your device
- The Product Key for your device
First, open the BrioSens and insert a SIM card in the BitPipe module. To do so, please refer to the SIM card installation section
Then, power-up the unit by plugging the AC/DC wall adapter.
Upon booting-up, the BrioSens will provide a Wi-Fi access point that can then be used to configure the device. The Wi-Fi access point name (SSID) will be the same as the serial number. This number can be found on a sticker under the BrioSens.
Connect to the Wi-Fi access point using the default credentials
Using a web browser, type the configuration dashboard URL: http://192.168.43.1. Once greeted by the login page, type the configuration dashboard password which is also find in the default credentials.
For security reasons, you will be prompted to change the Wi-Fi access point password. Keep in mind that by changing the Wi-Fi access point password, you will need to reconnect to the access point using the new password.
By logging back onto the configuration dashboard, you will once again be prompted to change a password.This time it is the dashboard password that will be changed.
Once the passwords are changed, you will be able to configure the BrioSens connectivity.
First, to enable cellular connectivity, we need to set your cellular APN under the Mobile settings section then save the settings.
You can also use a Wi-Fi connection to transfer the telemetry to Briosphere.
This is done via the Wi-Fi Settings section
To send the information over MQTT, you must first provide the MQTT broker URL and port under the Cloud settings section. To connect to Briosphere.io use the following:
- MQTT Broker URL:
mqtt.briosphere.io - MQTT Broker Port:
1883 - Provided password should be obtained by contacting us
The data being read from the sensors should now be available Briosphere.
Briosphere.io
Introduction
Briosphere is a website that allows you to manage and configure devices. For the BrioSens, the cloud is divided into 8 sections; dashboard, general settings, ADC, sensor, humidity, IO, temperature and user management. Each of them will be briefly explained in this document.
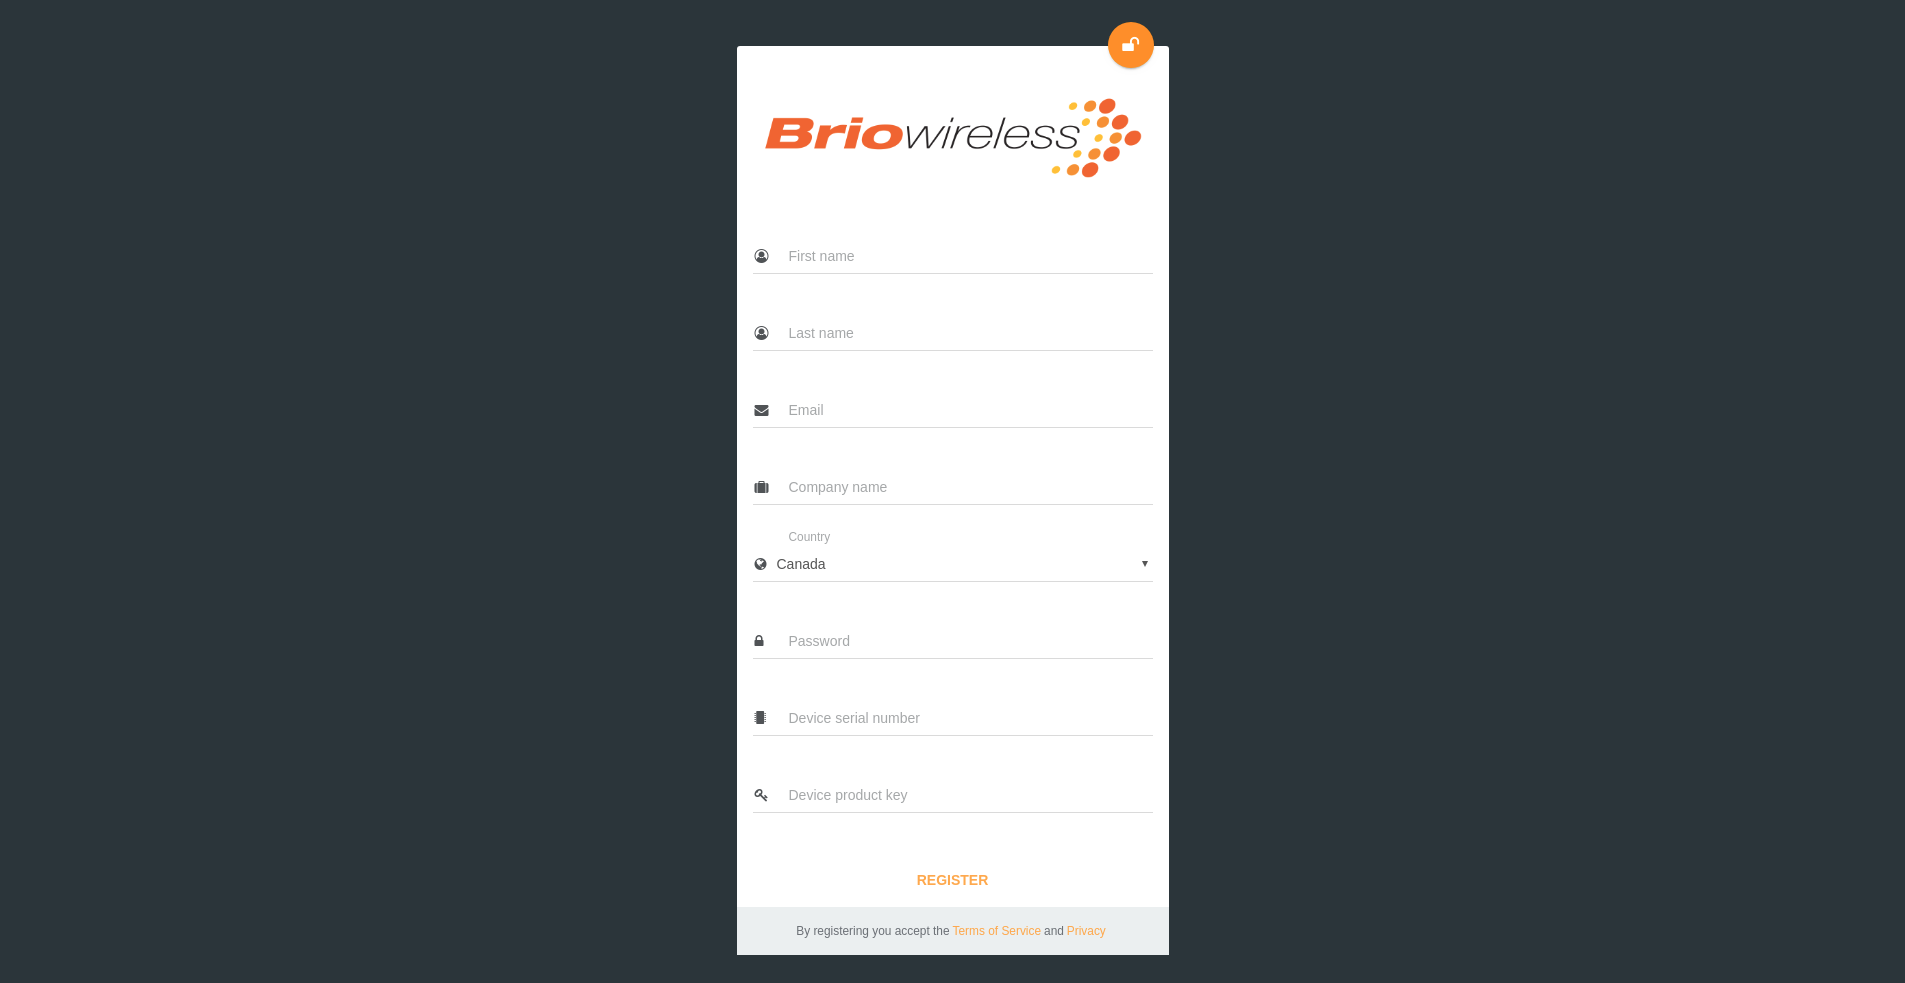
Create your account
Once you have obtained your device's credentials (serial number and product key are required), go to Briosphere registration page. Once the signup form completed, you will have access to Briosphere. If the given device has already been claimed by another user, you will need to ask him to add you via the "User Management" section.
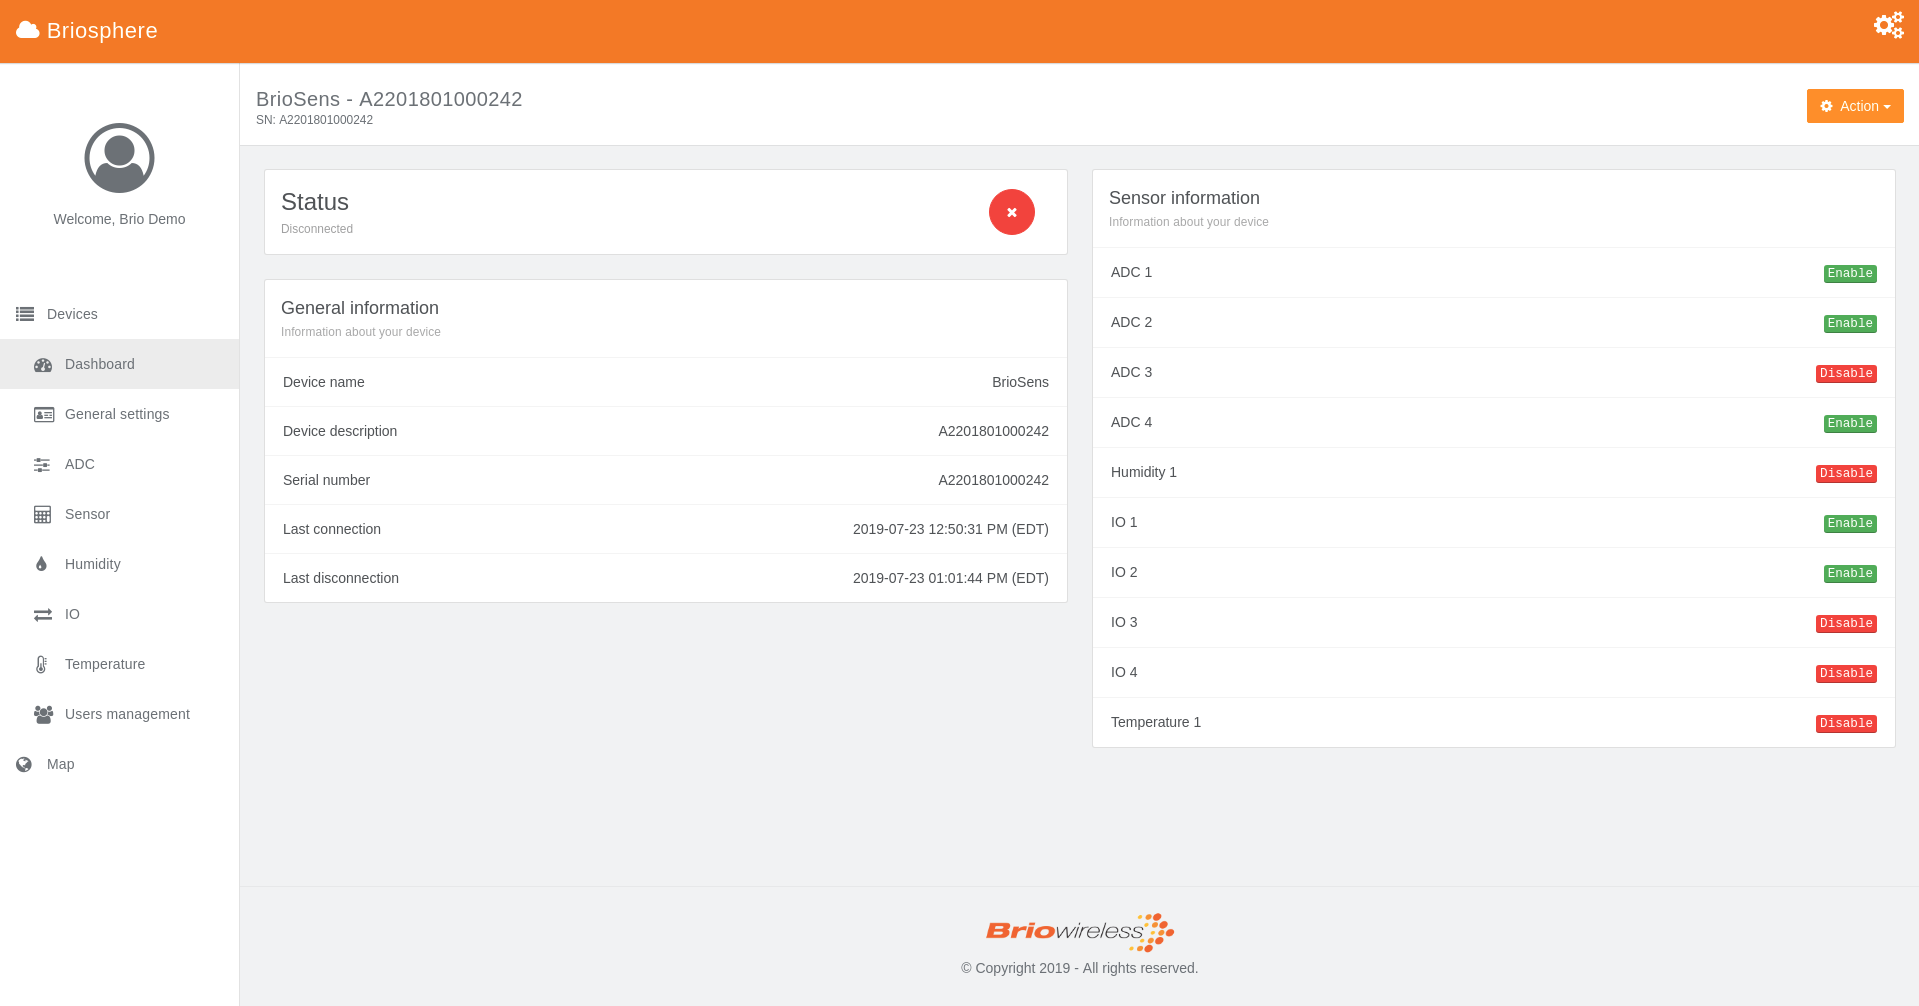
Dashboard
The dashboard allows to quickly see the device's status, general information and the enabled sensors.
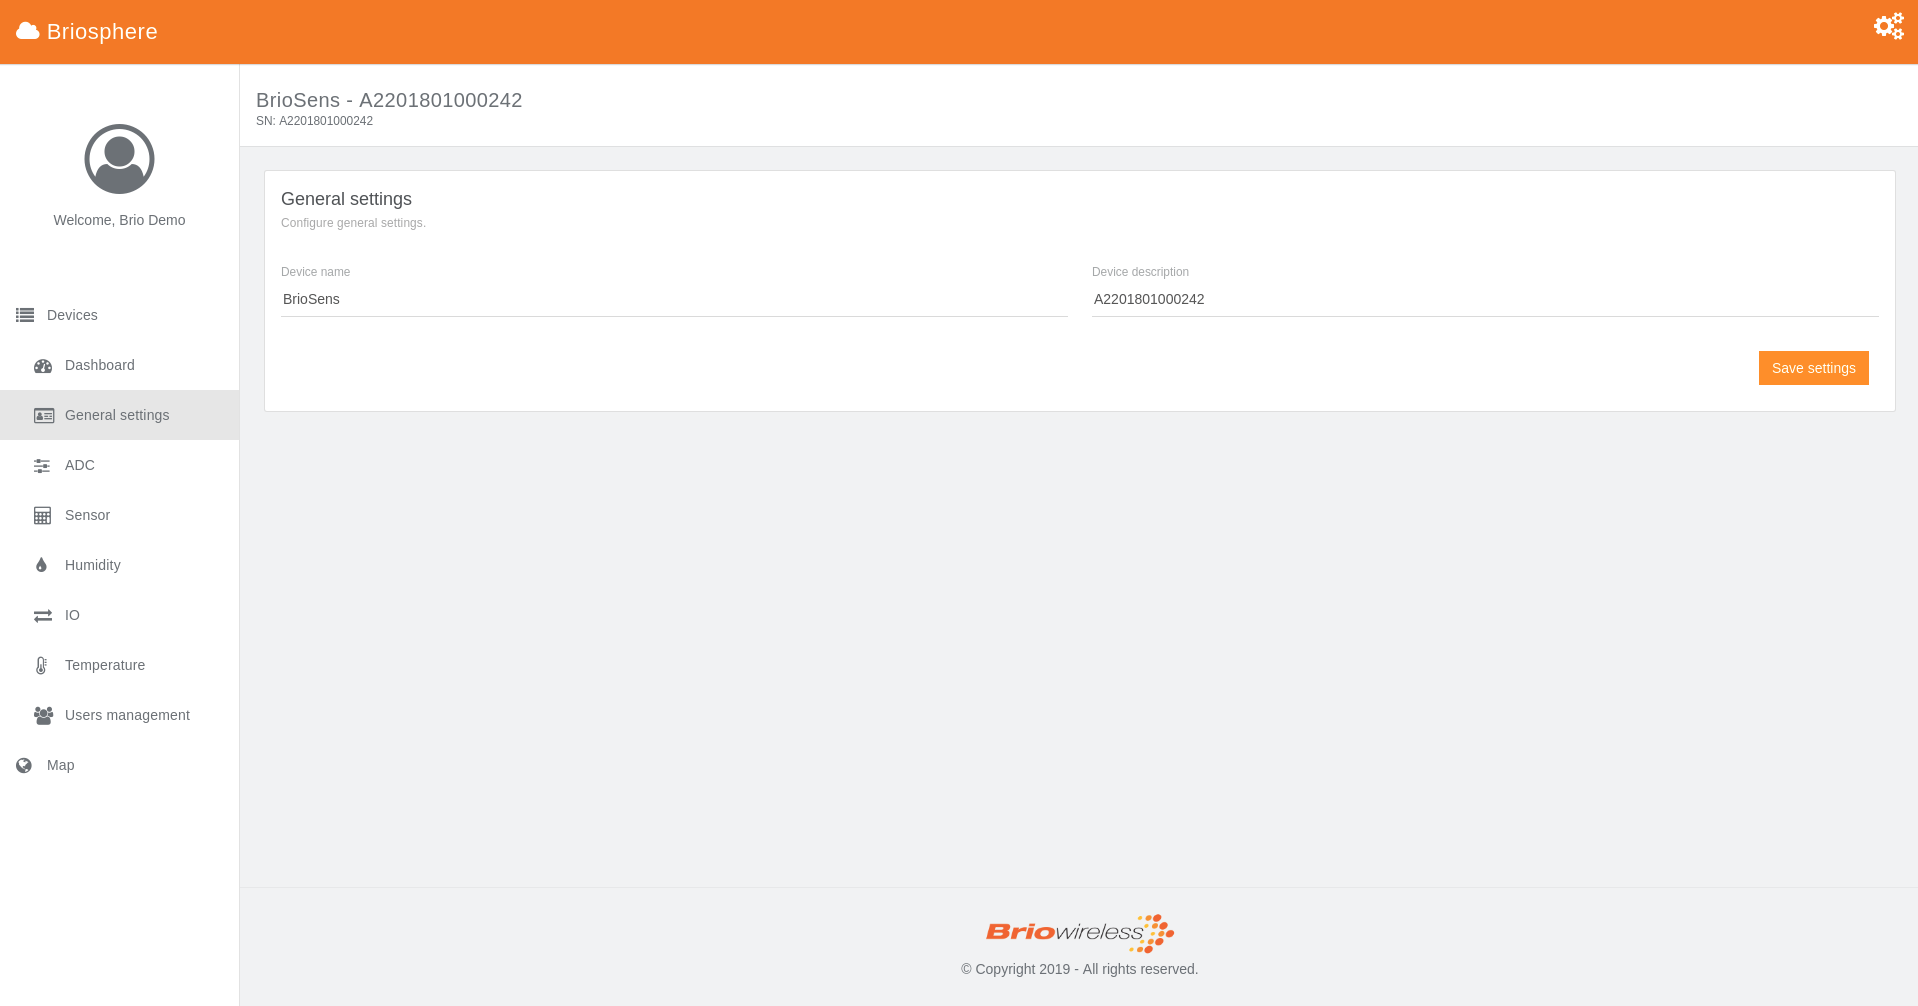
General settings
Easily identify your device with a name and a description of your choice.
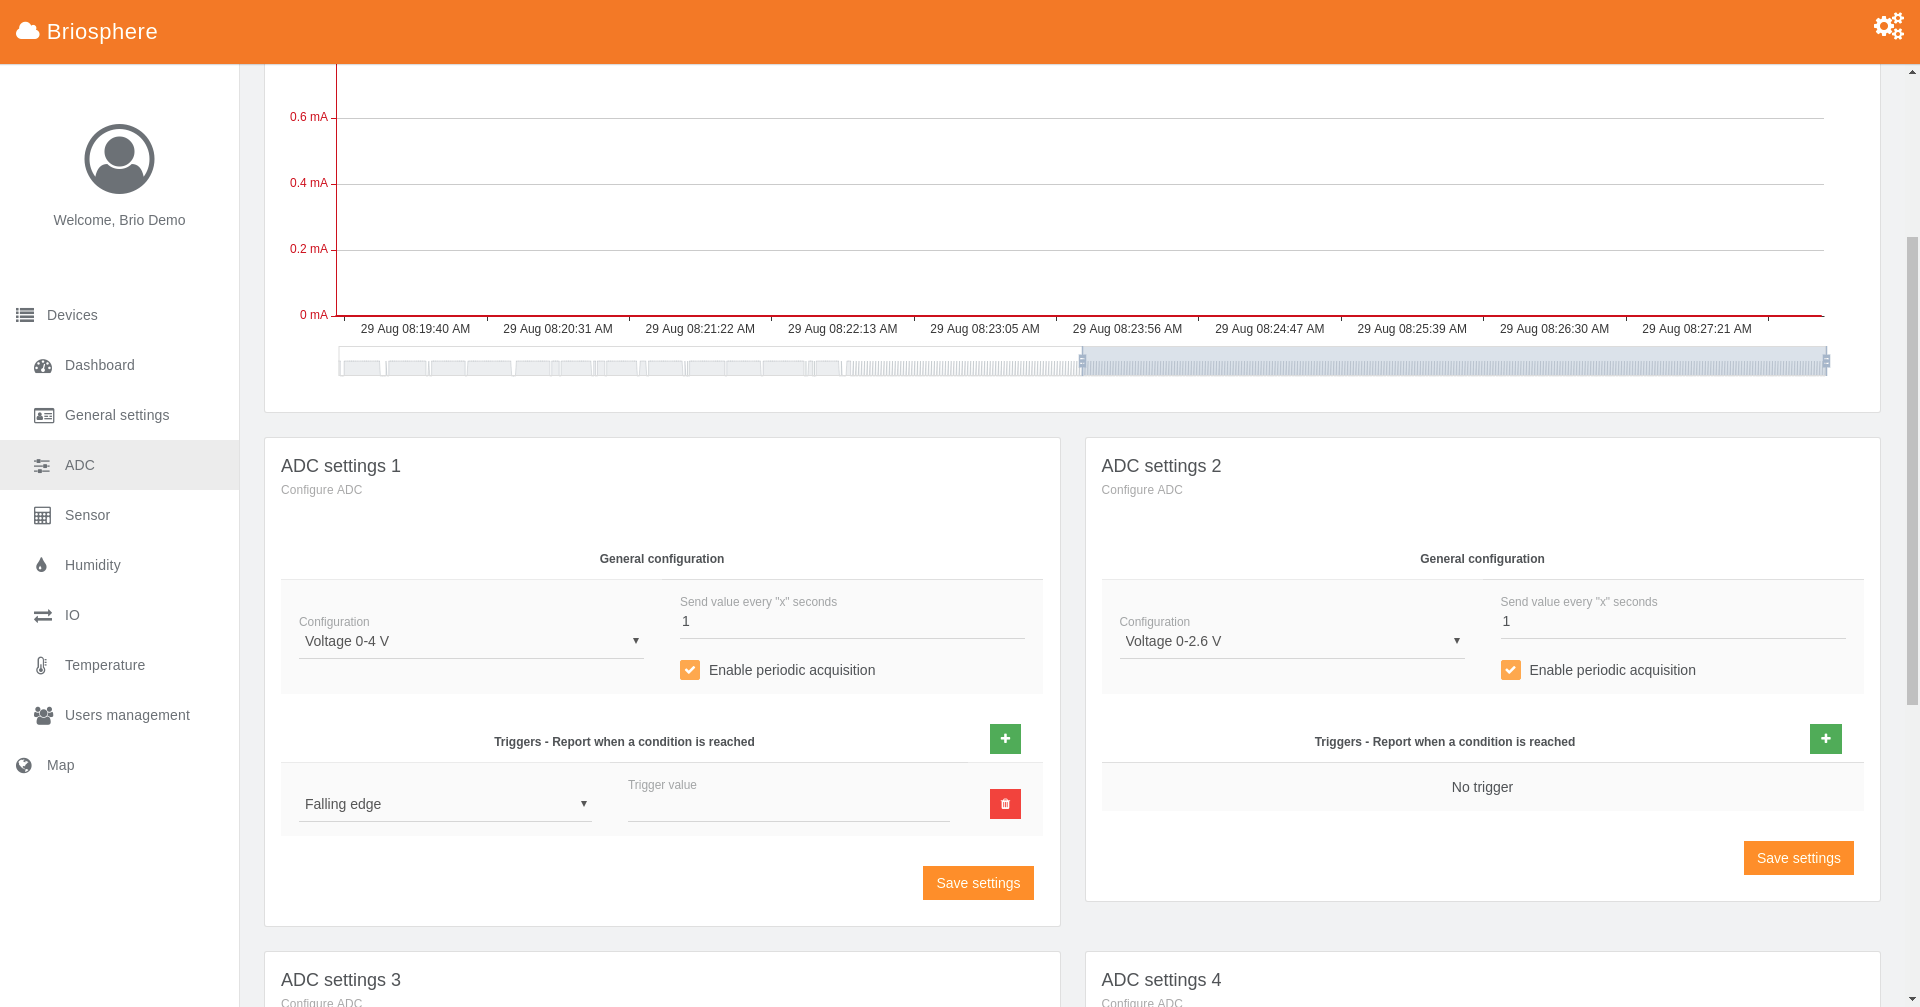
ADC
This page allows to configure four analog-to-digital converter. The possible configurations are as follows; disabled, current 4-20 mA, voltage 0-1.3V, voltage 0-2.6V, voltage 0-3.3V, voltage 0-4V, voltage 0-6V, voltage 0-7V, voltage 0-8V, voltage 0-14V, voltage 0-16V, voltage 0-20V and voltage 0-24V. It is also possible to set a periodic acquisition time for every one of them or to use triggers. When a trigger condition is reached, the value is sent to the cloud. By default, device's sampling rate is set to 500ms. Therefore, fast variations may not be detected. If needed, this soft limit can be changed for your use case (to do so, contact us). ADC configuration can be changed automatically if "Sensor" page is used.
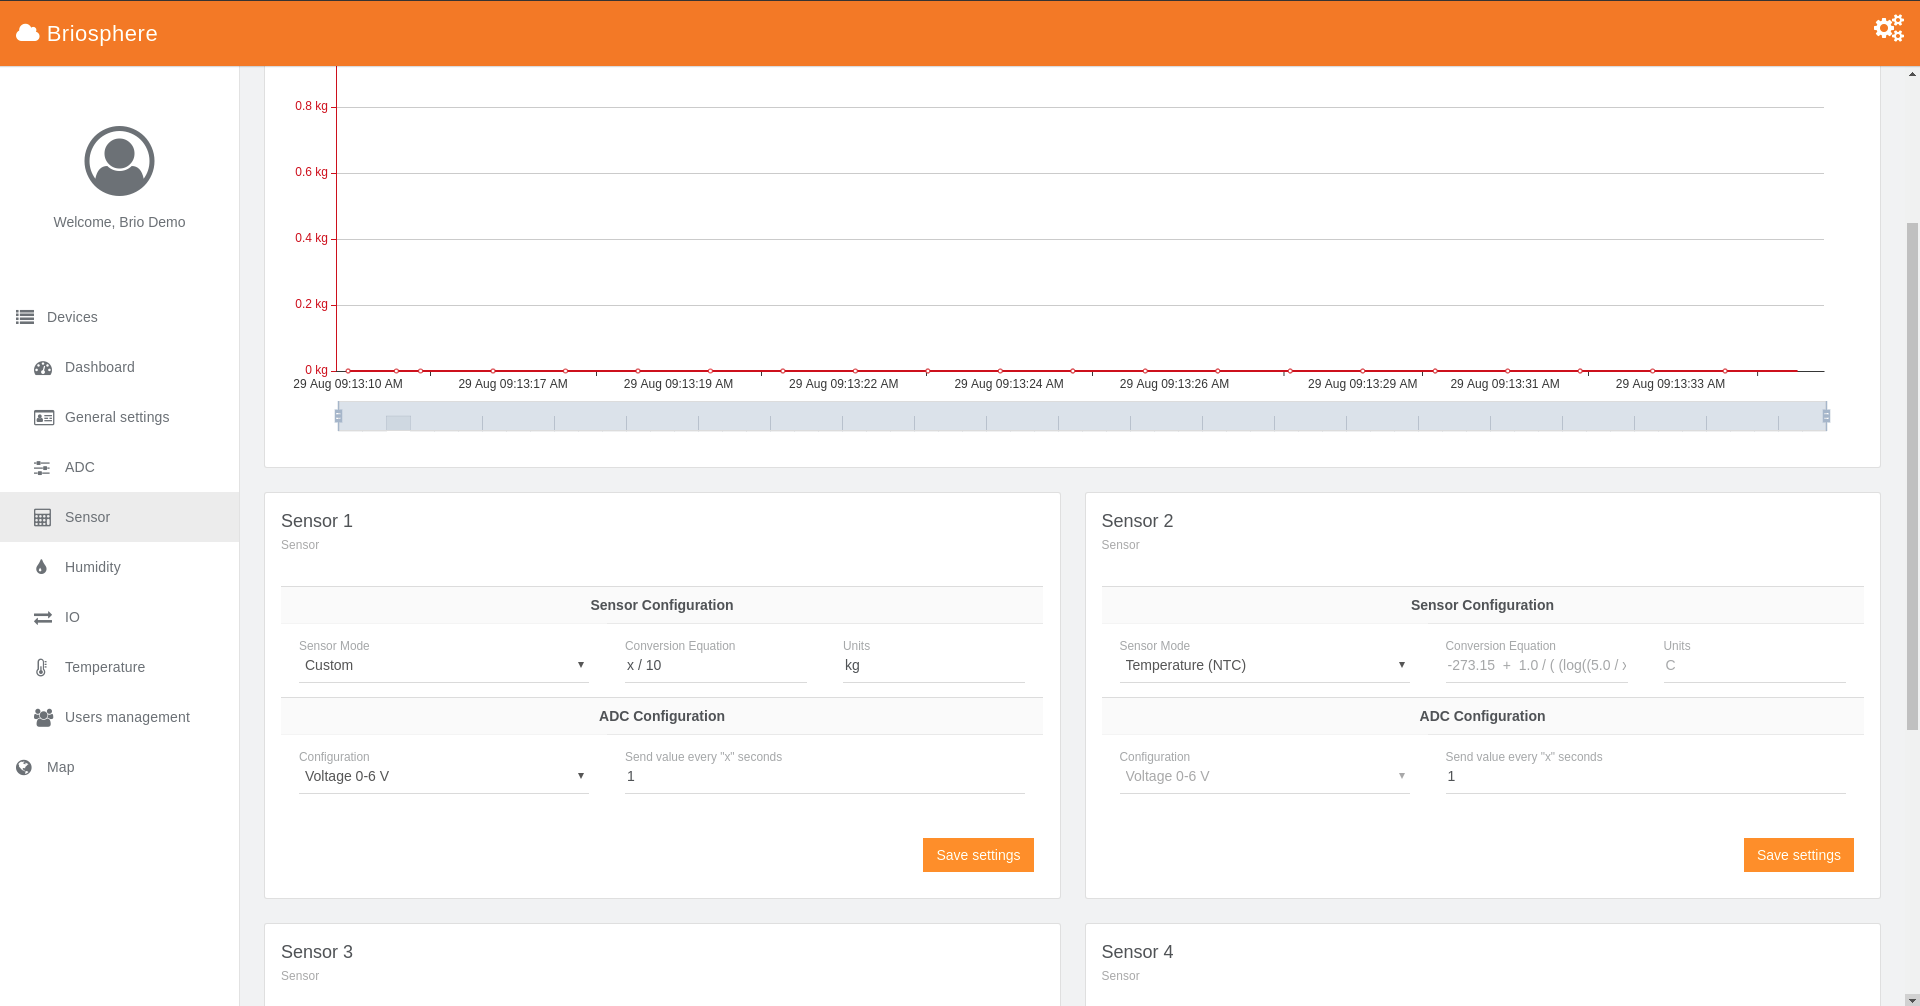
Sensor
This page allows to apply a mathematical formula on the raw value of any ADC in order to obtain a significant representation. Sensors from the IoT starter kit (temperature NTC, slider, humidity and load cell 5kg) are already implemented and ready to use. If one of them is selected, it will automatically set the right configuration. For a custom sensor, the conversion equation takes "x" as raw value.
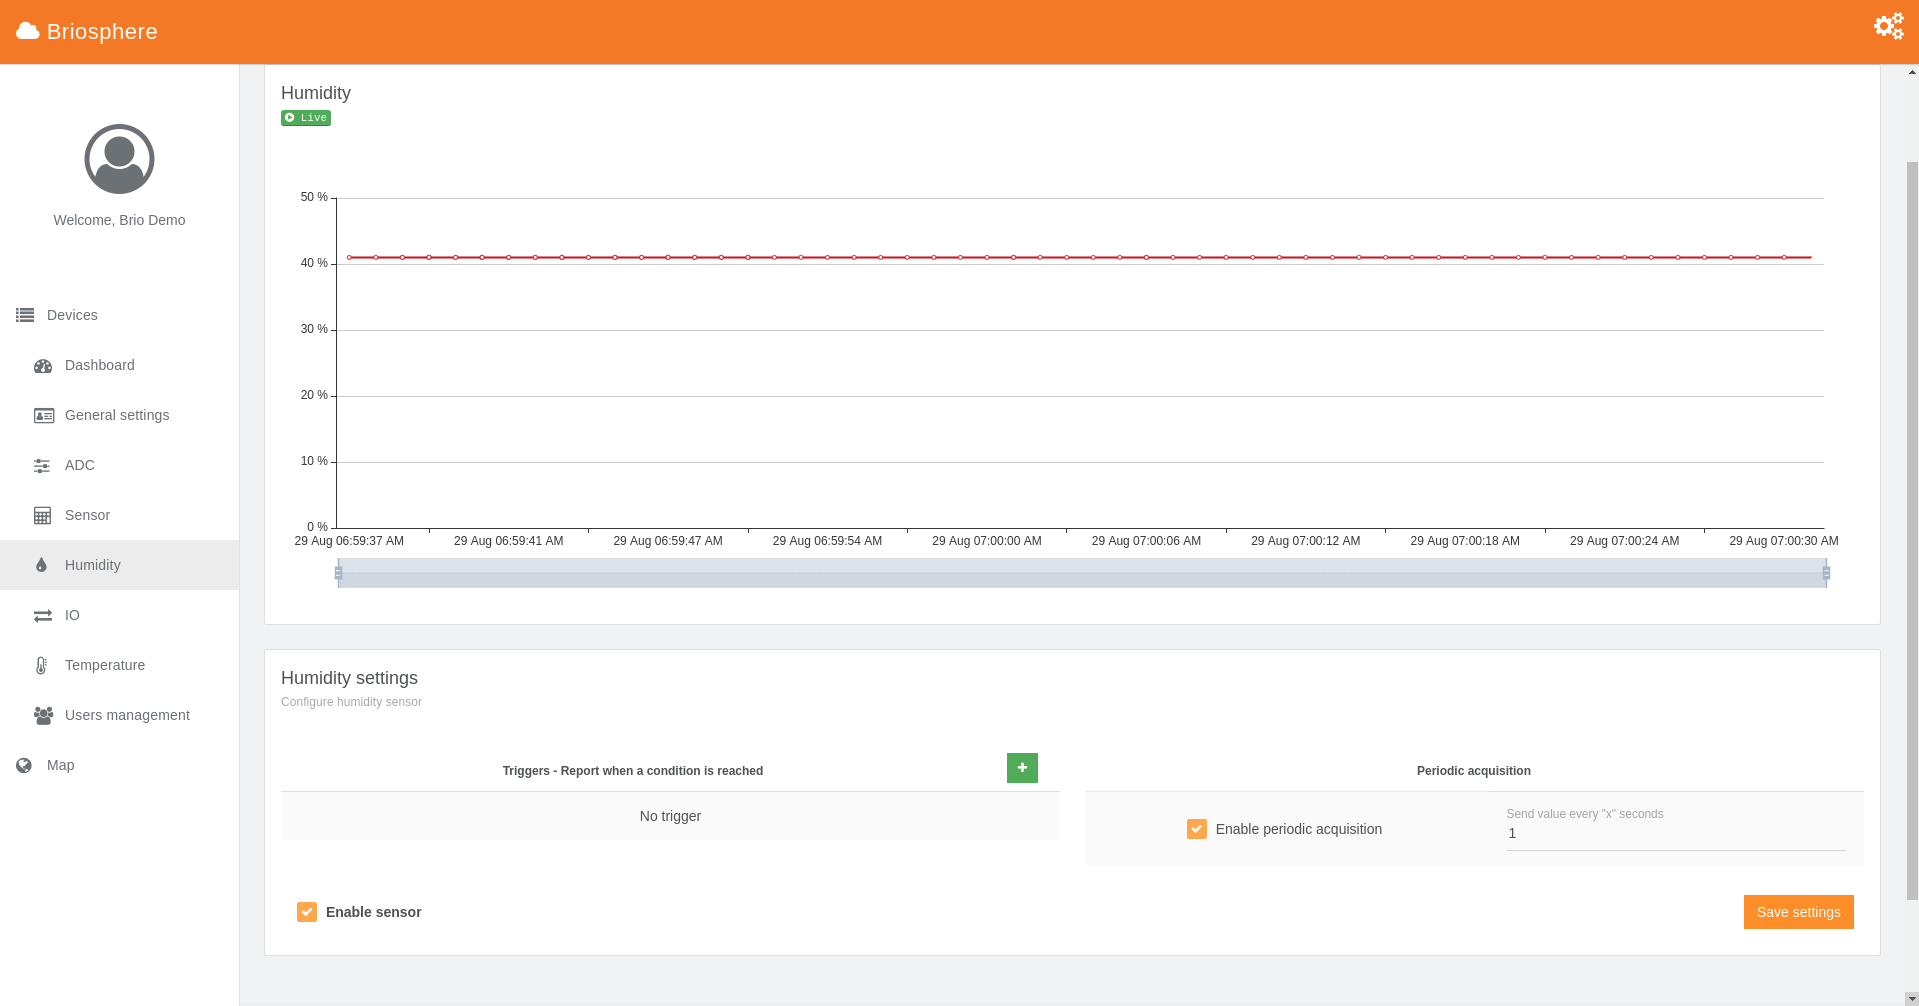
Humidity
This page allows to enable/disable and configure the frequency (periodic acquisition time) of the onboard humidity sensor. For advanced use, there is also the possibility of using triggers. When a condition is reached, the value is sent to the cloud.
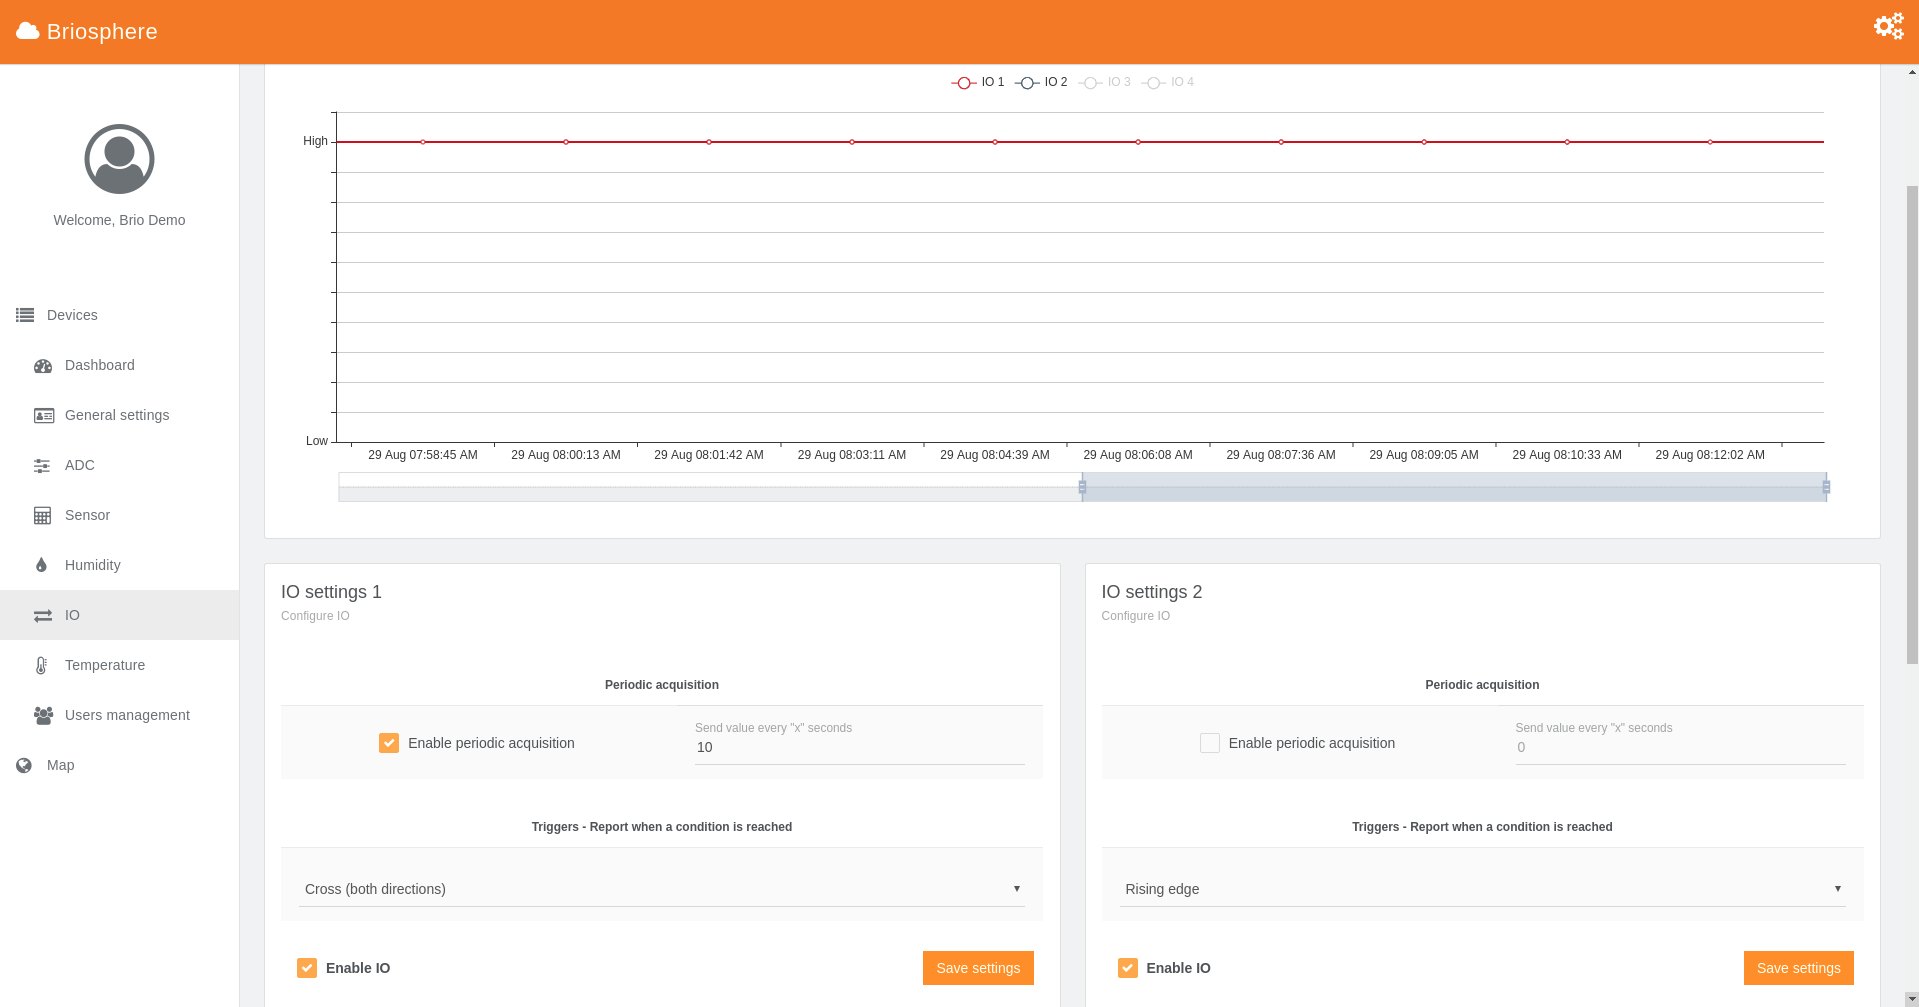
IO
This page allows you to configure four digital input/output (REV120 is only configurable in input mode). You can enable/disable and configure the periodic acquisition time of every input. It is also possible to use a trigger mode. When a condition is reached, the value is sent to the cloud. By default, device's sampling rate is set to 500ms. Therefore, fast variations may not be detected. If needed, this soft limit can be changed for your use case (to do so, contact us).
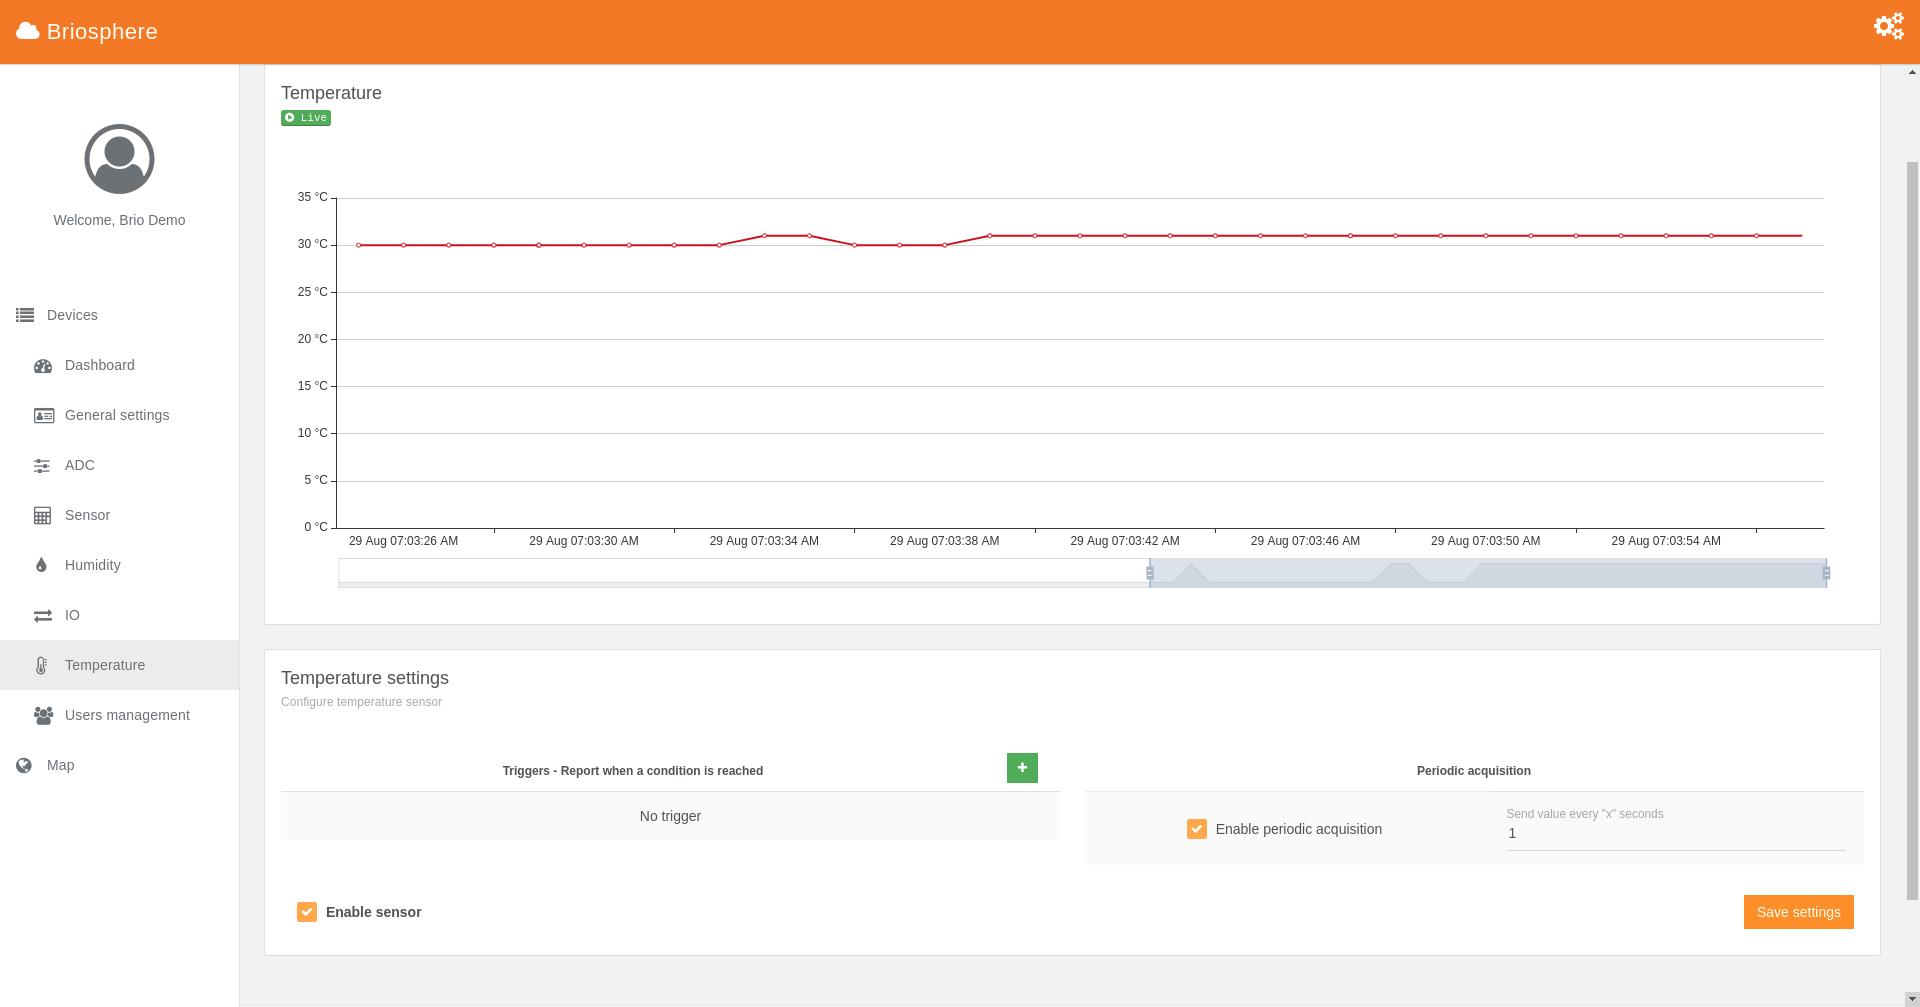
Temperature
This page allows to enable/disable and configure the frequency (periodic acquisition time) of the onboard temperature sensor. For advanced use, there is also the possibility of using triggers. When a condition is reached, the value is sent to the cloud.
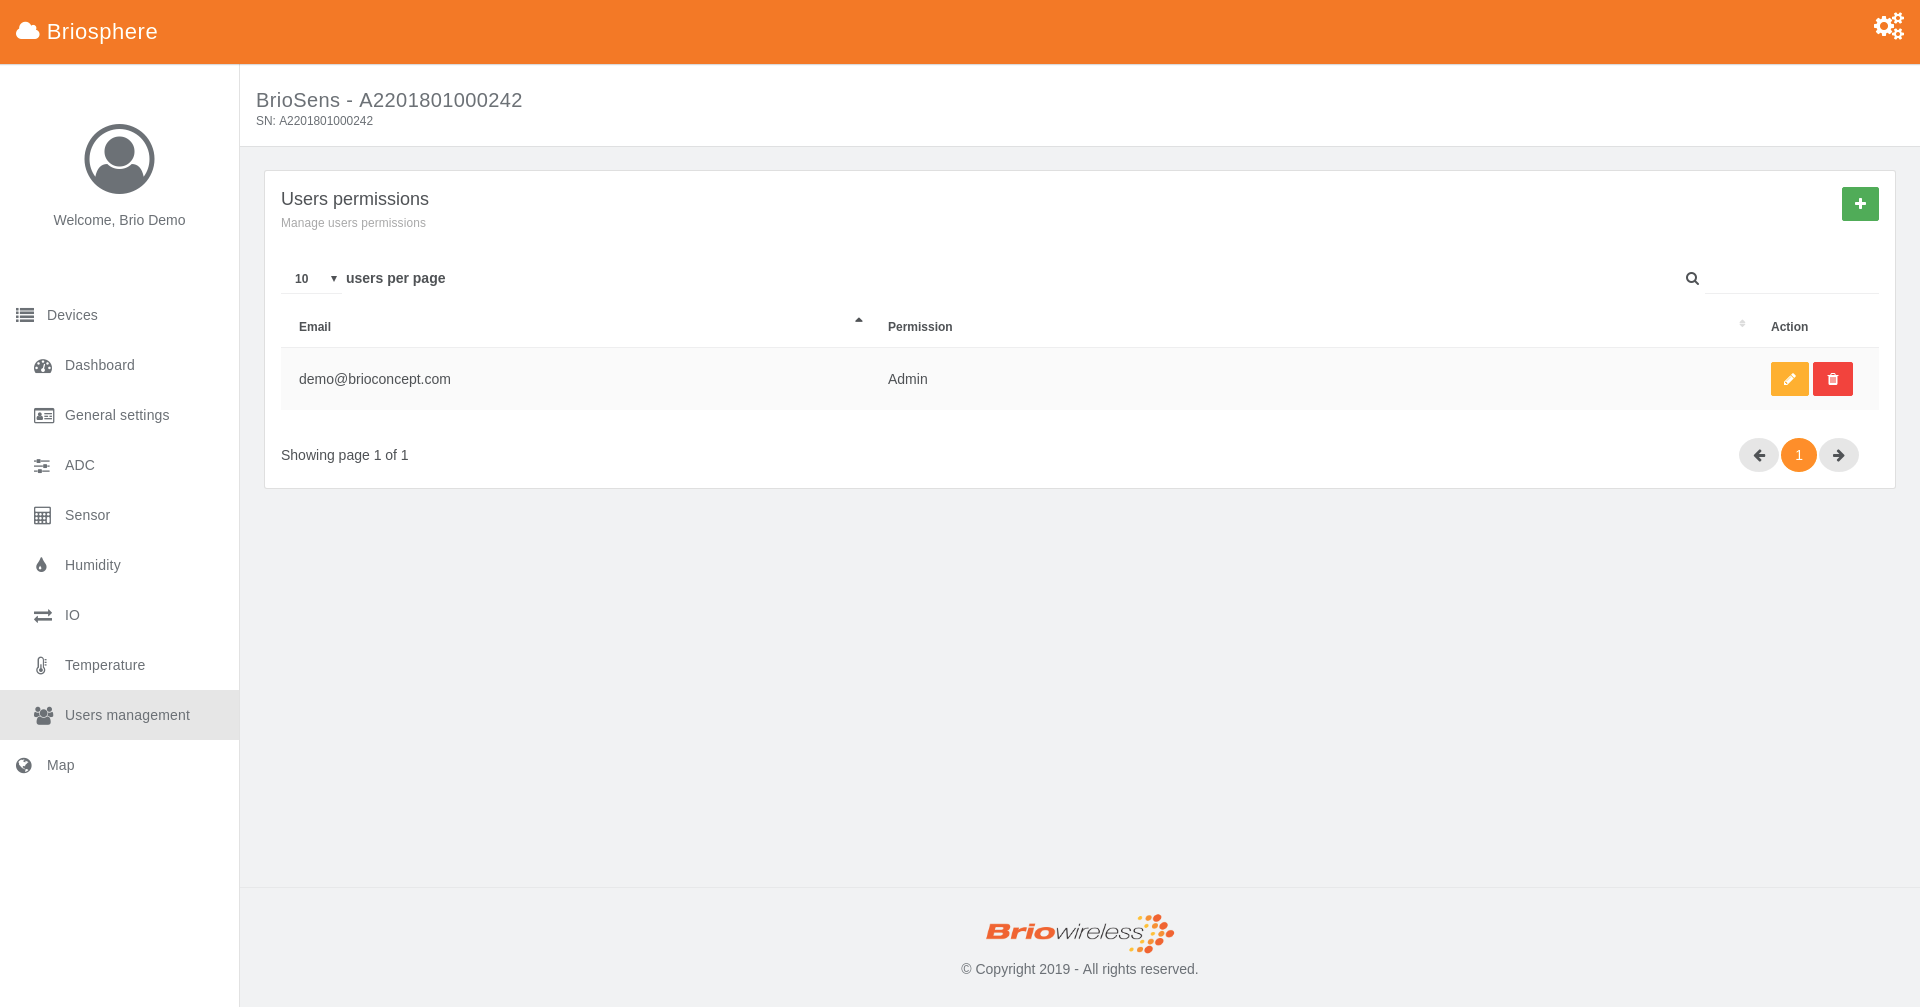
Users management
User management allows to add, remove or edit user's access for your device. If you add a new user, an email will be sent so he can finalise the creation of his account. Permission types are:
| View data | Edit device's params | User management | |
|---|---|---|---|
| Read | Yes | No | No |
| Write | Yes | Yes | No |
| Admin | Yes | Yes | Yes |